
Overview
Creating S3 Bucket Policies
Scenario
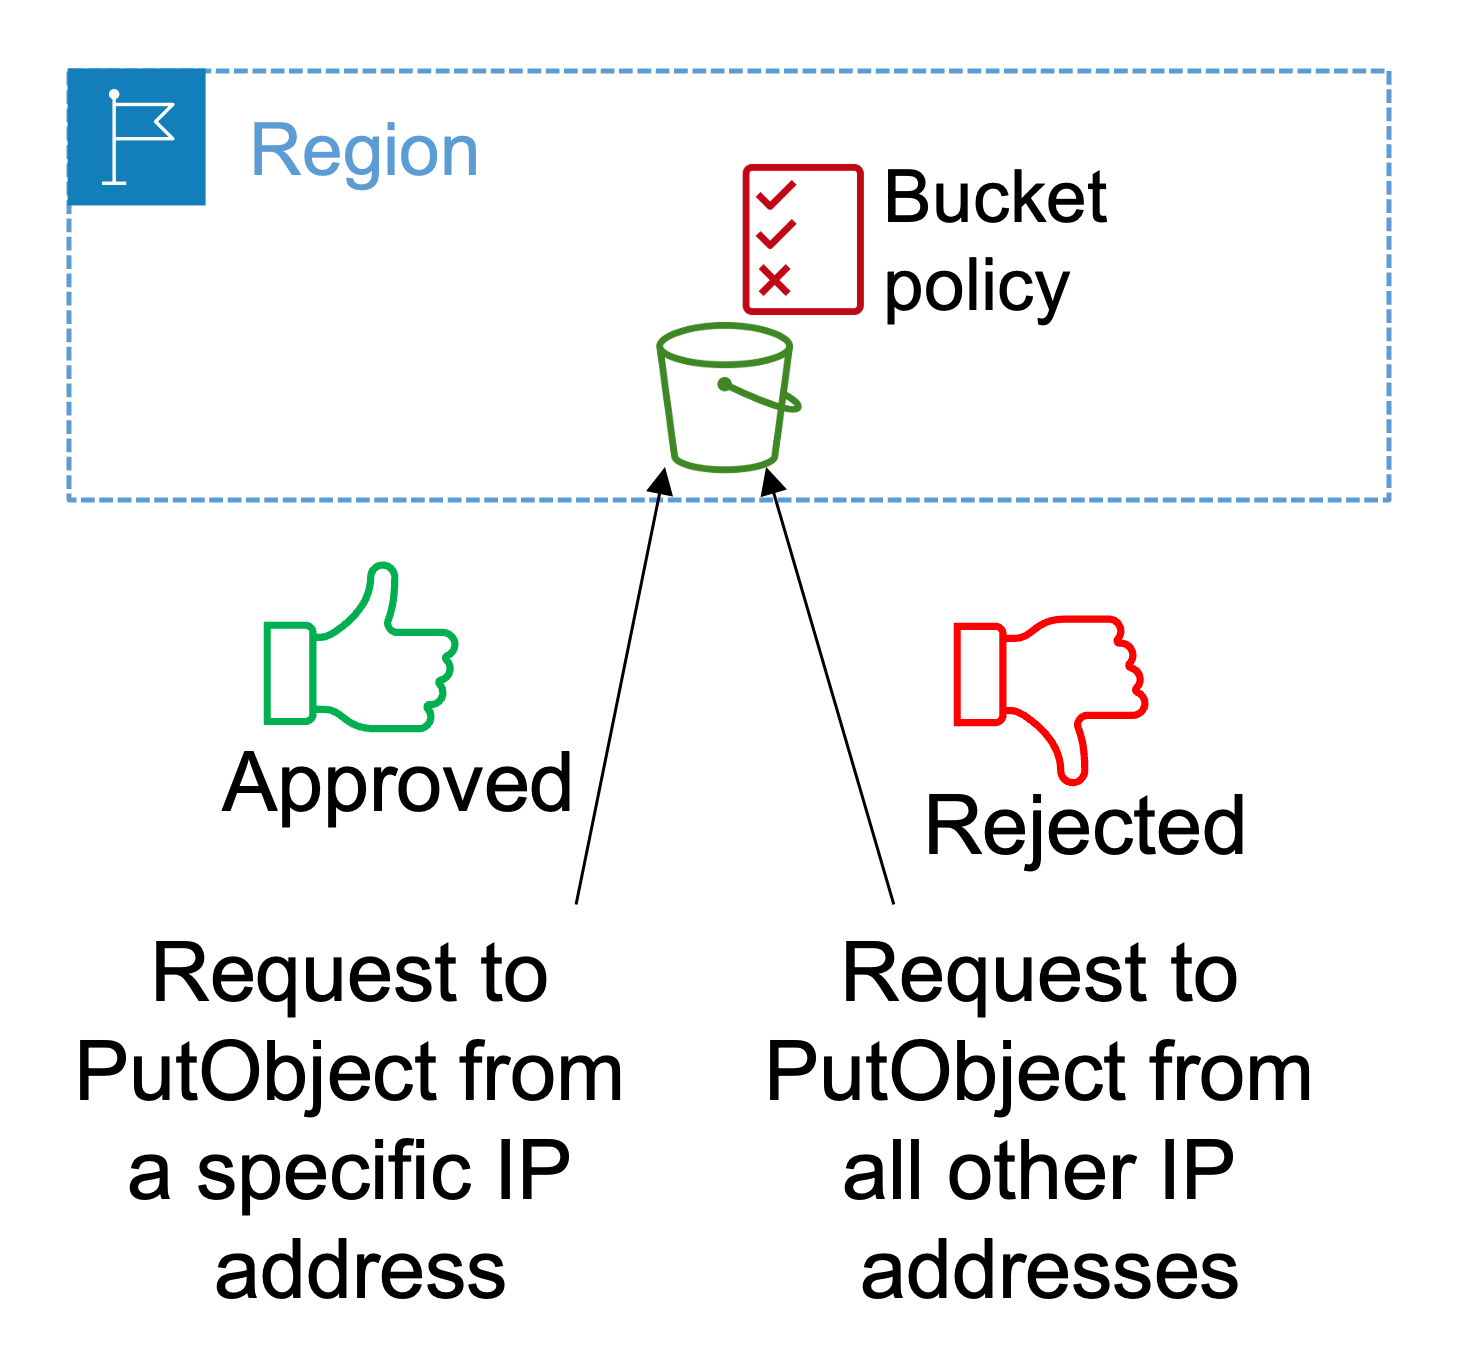
Hello engineers! You've just learned about the object storage service Amazon Simple Storage Service (Amazon S3), and you want to use it to create a bucket to store log files. You want to only allow requests to write objects to your bucket that originate from your computer's IP address. To accomplish this, you're going to have to create a bucket policy that includes a condition statement.
Lab Objectives
In this lab, you will do the following:
- Create a bucket
- Create a bucket policy that only allows PutObject requests from a specific IP address
Lab Architecture Diagram
The following architecture diagram shows what you are going to create in this lab:
Estimated Duration
This lab will take approximately 30 minutes to complete.
Solutions
For a demonstration of these solutions, watch the corresponding course video Demo - Creating S3 Bucket Policies.
Task 1 Solution: Create an S3 bucket
- From the Amazon S3 console, choose Create bucket.
- Enter a unique name for your bucket.
- Make sure that you select the same AWS Region that you used to start this lab.
- Choose Create bucket.
Task 2 Solution: Create a bucket policy
-
In your bucket, go to Permissions.
-
Under Bucket policy, choose Edit.
-
Choose Policy generator. The AWS Policy Generator will open in a new tab.
-
Under Step 1, for Select Type of Policy, select S3 Bucket Policy.
-
Under Step 2, configure the following:
-
Effect: Deny
-
Principal: *
-
Actions: Select PutObject
-
Amazon Resource Name (ARN): Enter the ARN of your bucket, followed by /* Here is an example: arn:aws:s3:::examplebucketname/*
You can find your bucket ARN in the bucket policy editor.
-
Choose Add Conditions and configure the following:
-
Condition: NotIpAddress
-
Key: aws:SourceIp
-
Value: Enter your computer's IP address
If you don't know what your computer's IP address is, you can find it at a website like https://whatismyipaddress.com.
-
-
Choose Add Condition.
-
Choose Add Statement.
-
Under Step 3, choose Generate Policy.
Your bucket policy should like similar to the following example:
{ "Id": "Policy1234567890123", "Version": "2012-10-17", "Statement": [ { "Sid": "Stmt1234567890123", "Action": [ "s3:PutObject" ], "Effect": "Deny", "Resource": "arn:aws:s3:::examplebucketname/*", "Condition": { "NotIpAddress": { "aws:SourceIp": "192.0.2.44" } }, "Principal": "*" } ] } -
Copy this policy and paste it into the bucket policy editor.
-
Choose Save changes.
Task 3 Solution: Test your bucket policy
-
In your bucket, go to Objects.
-
Choose Upload, choose Add files, and select a file to upload.
Note: If you need a file to upload, create a text file with some random text, save it, and upload it.
-
Choose Upload.
-
Observe that you get the message Upload succeeded.
-
Choose Close to clear the message.
-
Return to your bucket policy under the Permissions tab.
-
Edit the bucket policy by replacing your computer's IP address with a fictitious IP address, such as 192.0.2.44.
-
Save your changes and try uploading your file again.
- Observe that this time you get the message Upload failed.